
Salesforce Marketing Cloud Engagement – Custom Content Blocks
Content Block Directory
The Bulletproof Button – A button that looks great in Outlook, Gmail, and other email clients.
The Bulletproof Hero – An image with text overlay that works for screen readers, Outlook, and other email clients.
The Bulletproof Deadline – A countdown without the ampscript coding headaches.
The Bulletproof Button
A custom content button block that renders
correctly for Outlook, Gmail, Apple Mail, and all of the others.
We’ve solved one of the biggest pains with the out of the box button content block in Salesforce Marketing Cloud. You build a button that looks great in Gmail, but once it hits the corporate email server, Outlook strips off your rounded corners and you end up with a dull square button with no margins around your text. Our hosted Custom Content Block – The Bulletproof Button – is yours, for free, to bring into you SFMC instance and start creating beautiful buttons.
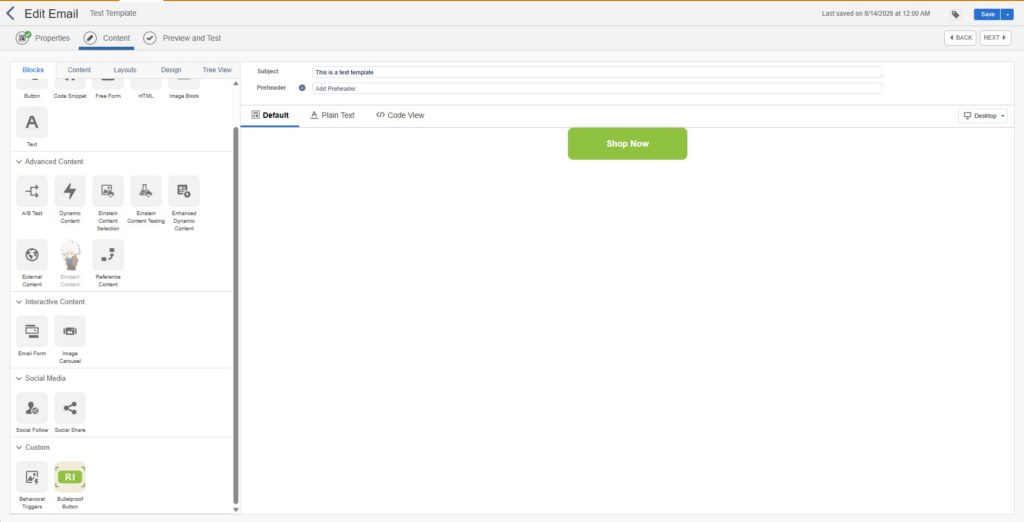
Custom Content Block Appears on the Email Build Canvas 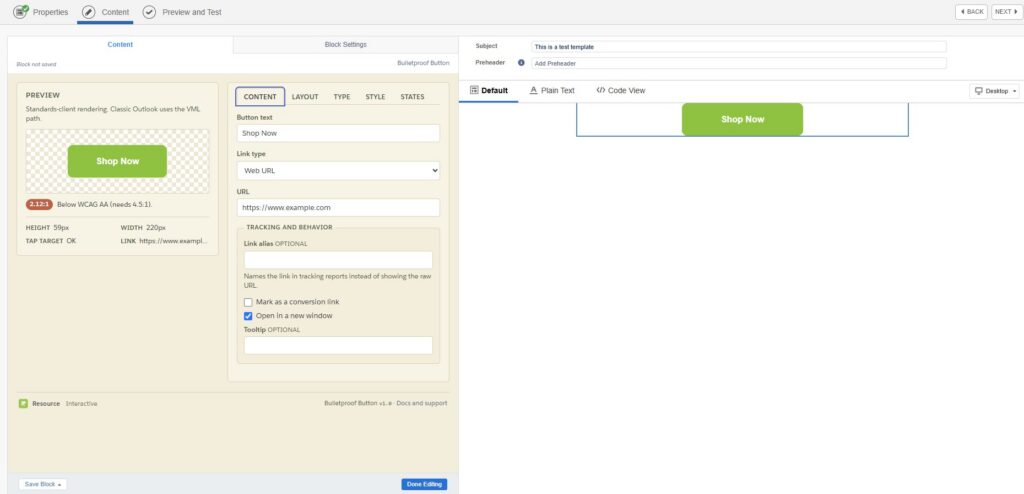
Tabbed Configuration gives you the options you are familiar with 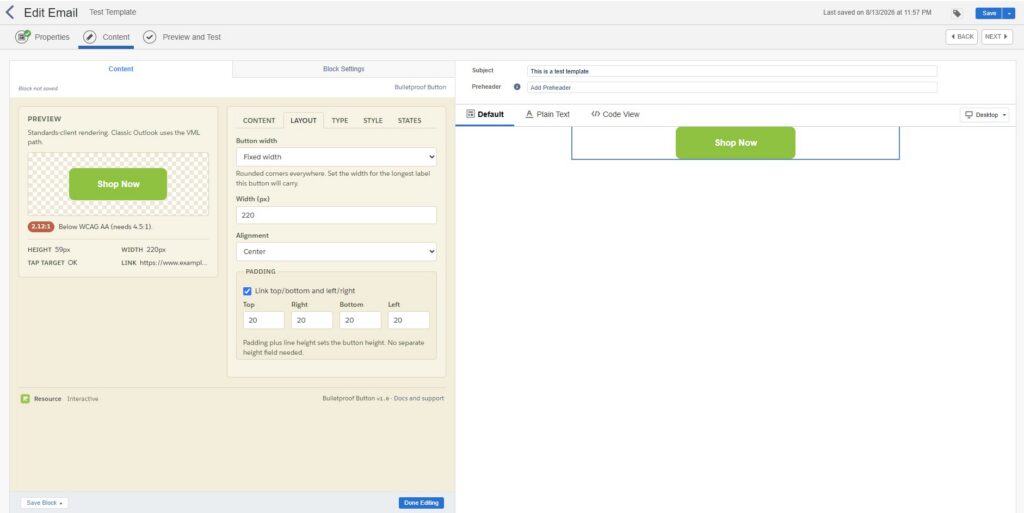
Customize the Layout of your button
The Setup
Step 1: Log into SFMC and Click on Setup.
Step 2: Under Platform Tools, Expand Apps, Then Click on Installed Packages
Step 3: Click New
Step 4: Give Your Package a name. We use “Bulletproof Button” and Click Save.
Step 5: Click on App Component, then Select Custom Content Block, and Click Next.
Step 6: Set the Custom Content Block Properties by giving it a Name. Again we use “Bulletproof Button” and the endpoint,
https://resourceinteractive.net/sfmc-blocks/bulletproof-button/
and then Click Save.
Step 7: Click on the Access Tab and then click on License Everyone.
Help Keep our Blocks Free
The Bulletproof Hero
A custom content image block that renders
correctly for Outlook, Gmail, Apple Mail, and all of the others.
We’ve solved one feature that has been missing from Marketing Cloud forever. The Text over Background Image. No longer do you have to embed text into your banner images, you now have a content block that gives you something every modern email application has.
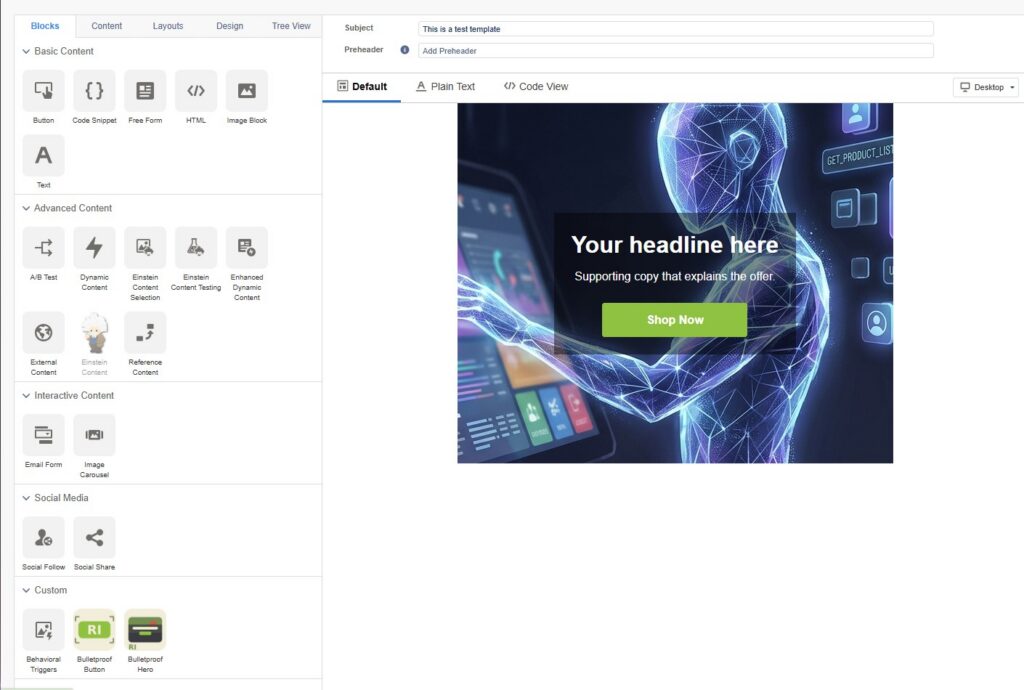
Custom Content Block Appears on the Content Canvas 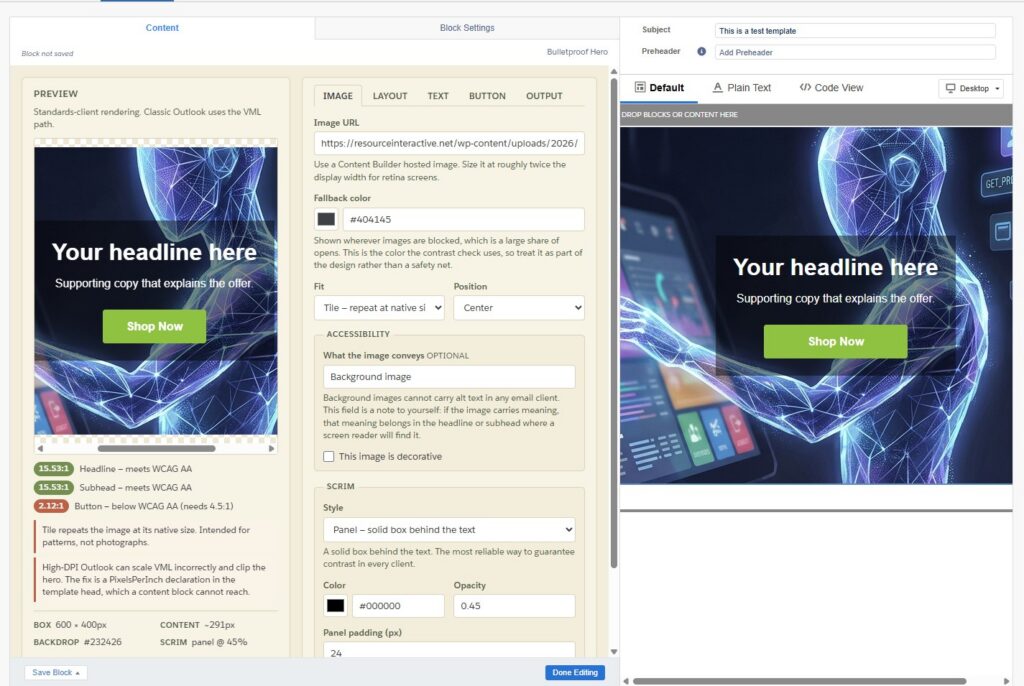
Tabbed Configuration gives you the options you are familiar with 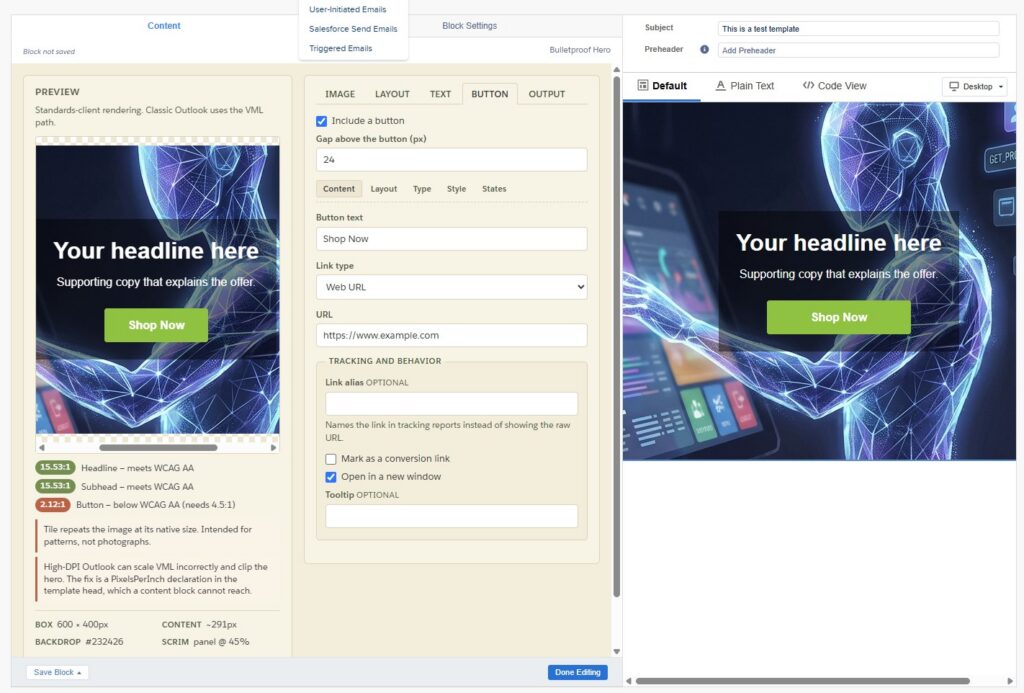
Customize the Layout of your button
The Setup
Step 1: Log into SFMC and Click on Setup.
Step 2: Under Platform Tools, Expand Apps, Then Click on Installed Packages
Step 3: Click New
Step 4: Give Your Package a name. We use “Bulletproof Hero” and Click Save.
Step 5: Click on App Component, then Select Custom Content Block, and Click Next.
Step 6: Set the Custom Content Block Properties by giving it a Name. Again we use “Bulletproof Hero” and the endpoint,
https://resourceinteractive.net/sfmc-blocks/bulletproof-hero/
and then Click Save.
Step 7: Click on the Access Tab and then click on License Everyone.
Help Keep our Blocks Free
The Bulletproof Deadline
A custom content block that gives you a timer and deadline that renders
correctly for Outlook, Gmail, Apple Mail, and all of the others.
Time’s up. Building a countdown timer, an exploding offer, or anything that requires calculating a start date, an end date, and how you want things displayed used to take multiple lines of ampscript. Also figuring out if its daylight savings time, what time zone you are in and making sure the text doesn’t say something dumb, like 1 days left was always a pain. Well, look no further. We have that one solved too.


The Setup
Step 1: Log into SFMC and Click on Setup.
Step 2: Under Platform Tools, Expand Apps, Then Click on Installed Packages
Step 3: Click New
Step 4: Give Your Package a name. We use “Bulletproof Deadline” and Click Save.
Step 5: Click on App Component, then Select Custom Content Block, and Click Next.
Step 6: Set the Custom Content Block Properties by giving it a Name. Again we use “Bulletproof Deadline” and the endpoint,
https://resourceinteractive.net/sfmc-blocks/bulletproof-deadline/
and then Click Save.
Step 7: Click on the Access Tab and then click on License Everyone.